60 Before 60 Project: #33 - Make Jam
It's strawberry season! I love homemade strawberry jam but have never tried making it myself. Thought I would would give it a try.

5 min read.
I love jam. And I especially love homemade jam. Whenever someone gives me a bottle of jam that they made, I can’t help but marvel at their talent. Whenever I think of making jam, I have visions of loads of cut fruit, large pots, sterilizing mason jars and a whole lot of work.
Now I have made jelly once before.
A few years back when we were visiting my father in law, his apple tree was dropping apples all over his lawn and it seemed crazy to just to throw them out. So I peeled and cut the apples, added a ton of sugar and basically just boiled it down to mush and then strained the juice into sterilized jars to set. It turned out okay. The jelly was a bit on the runny side but tasted okay and certainly better than just tossing these apples into the compost heap.
Right now it’s strawberry season where we live. Whenever this happens, I always tend to have a case of my eyes being larger than my stomach and over buying them. As I looked at this large surplus of strawberries in my fridge that I knew we just wouldn’t be able to eat, I wondered what I could do with them.
Jam I thought – I could make jam!
But I had some criteria this go round. I didn’t have a ton of strawberries so I wanted a recipe that was easy (and able to convert to a smaller batch if necessary), didn’t have too much sugar, didn’t need pectin, wasn’t a whole lot of work. I also wanted to have a high likelihood of success.
I found a recipe that seemed pretty simple; Homemade Strawberry Jam (Sugar Reduced Strawberry Jam).
I also discovered that if I wasn’t making any large batches to be stored for a long time, I could make what is called refrigerator jam. The jam is stored in the refrigerator and is to be eaten within a short period of time. So the canning aspect of sterilizing the jars and then boiling them after the fact was now off the table – phew.
Here’s how things went.
Step 1:
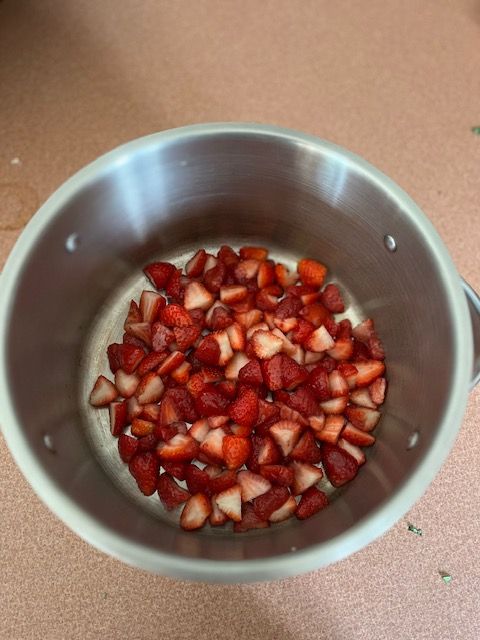
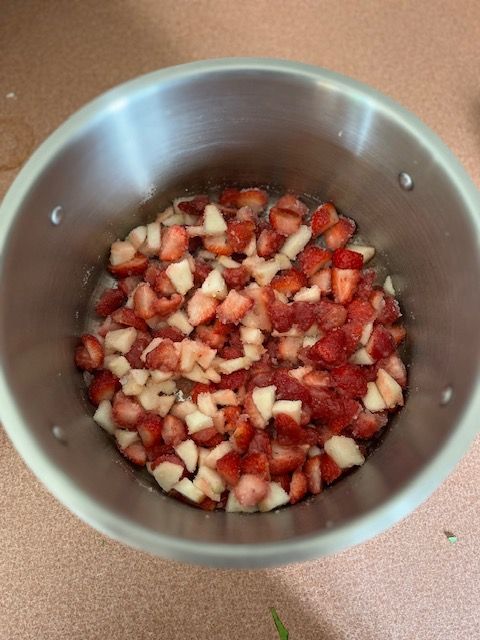
I cleaned and hulled the strawberries and cut them in halves. Turned out I didn’t have enough strawberries to make the full recipe so I had to cut the ingredients used in half. I also put a plate in the freezer. (you’ll find out why I did this towards the end of the process).
Step 2:
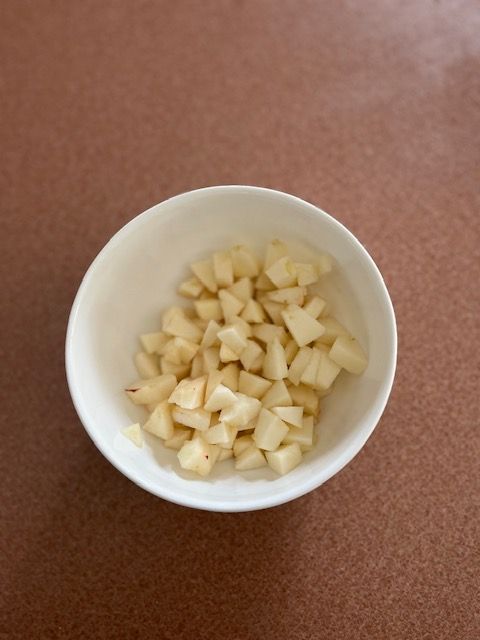
I then peeled and diced two apples. I believe that the apples are the reason I didn’t need to add pectin as they naturally contain it.
Step 3:
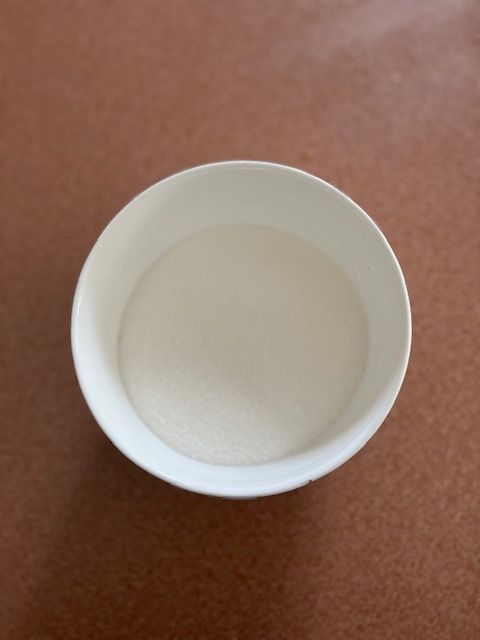
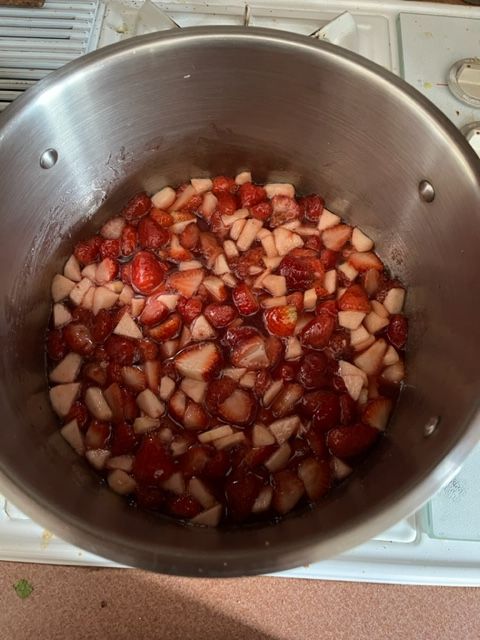
I added the sugar. Even though this was a reduced amount – this was still a lot of sugar. Something I should probably take into consideration when eating.
Step 4:
I measured the lemon juice and added it to the mixture and mixed everything together.

Step 5:
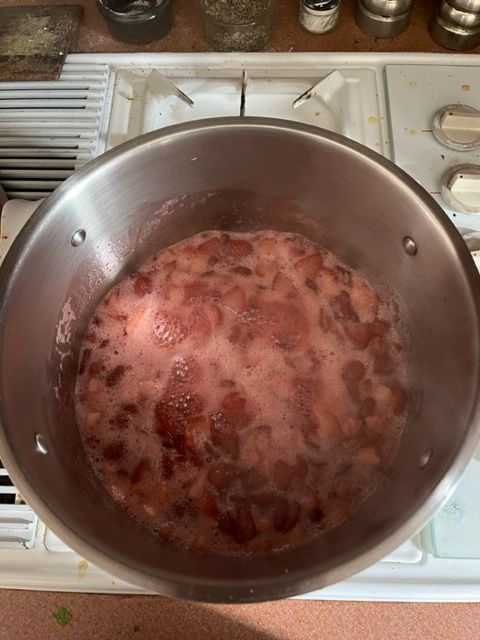
Began to slowly heat up all the ingredients. The intention at this stage is to slowly dissolve the sugar.
Step 6:
Now it was time to bring everything to a boil for about 40 minutes. Just a couple of safety things to be aware of if you’re going to try this. Sugar can heat up and burn quickly so you never want to leave it on the stove unattended. Also, it was suggested that the mixture be stirred frequently to make sure it doesn’t stick to the bottom of the pot.
Step 7:
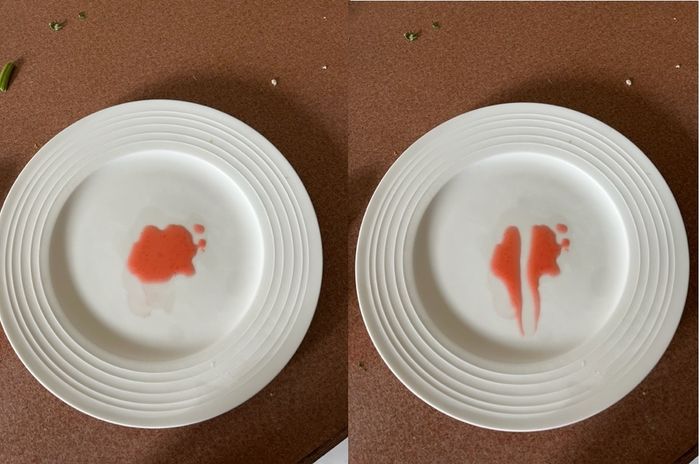
I was now in the final stretch - testing to see if the jam has cooked enough. This is where the frozen plate comes in.
It was suggested that to test to see if the jam was ready, put some of the jam on the frozen plate. Then draw a line through the jam and should it stay separated, it was a good sign it was ready to go. Also, it was advised to watch the temperature of the jam and cook it to 220 degrees.
Step 8:
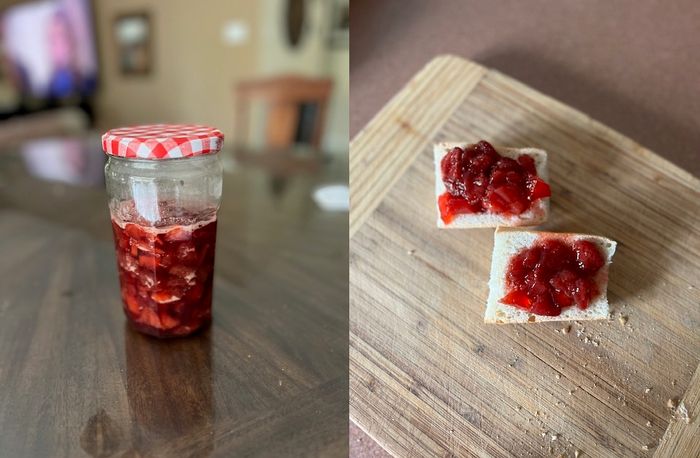
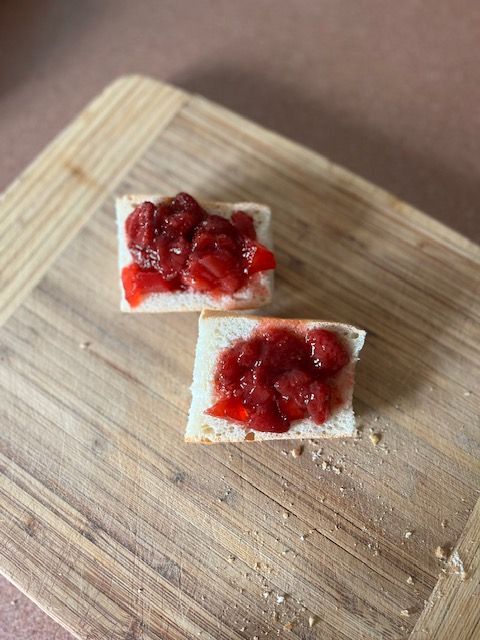
Now it was time to bottle. I had a clean jar ready so I poured the jam in. I was surprised by how much the mixture had shrunk. I let the jam cool and then put it in the fridge.

Now time to enjoy! The jam is delicious. No complaints. Only thing was it was just a little on the runny side though. I have to use a spoon rather than a knife. I may have needed to cook it just a bit longer.
Given this was the first time I tried to make strawberry jam, I was pleased with the results and will likely do this again. The whole process from start to finish probably took about an hour.
Now I’m not sure if I’ll be bottling jam anytime soon to give to others though, but if anyone comes over, I can now offer them some homemade jam from my fridge. They will probably have to get here in the next week though!
My 60 Before 60 Life Lesson: Sometimes taking just a little extra time and effort can take something good and transform it into something even better
Interested in seeing all my 60 Before 60 experiences? Click here.